
Hi Bellas,
I attended a MAC Pro Class here in Atlanta and it was a really fun topic - Drag Makeup! I learned a lot of great tips and also picked up some new items for myself and my kit. I was able to capture all of this in a detailed post for those of you who can't attend these seminars because you maynot be a pro member or maybe they don't have classes/pro stores in your city. Check it out!
Check out the video!
I'm not able to pose pictures of the drag makeover. The MAC artist made the point that the model works as a male model, and posting pictures of him in drag might hurt his career. However, I can definitely share some tips I learned! The MAC Senior Artist Christopher Del Castillo was super experienced and funny. He accomplished a lot in 2 hours considering Drag Makeup can take up to 3-4 hours. Here are a few things I learned:
BROWS
- Brows are huge to making a male look more female. Men usually have a heavier browbone...by concealing the brows, you give the illusion of more lid space and a more feminine look.
- To conceal brows, try using a product like Cream Pro's Aide - it's an adhesive for prosthetics but works well to cover brows as well. It reacts well with body temperature and doesn't melt. But mind you, Drag Makeup looks better from afar.
- He mentioned that he's used brow wax, glue stick, and even Mortuary Wax in the past - but Pro's Aide holds up the best. Use the product along with the grain of the hair.
- Make sure to redraw the brows above the concealed area, in a feminine shape. He used Lingering Brow Pencil and Cork eyeshadow.

- The MAC Artist used several layers of foundation - but the first part was extensive skincare application. This was to soften the skin - men tend to have a rougher texture, and it needs to be plumped and moisturized to give a more feminine look.
- He used a combination of products for coverage, we're talking about maximum concealing - First he applied BB Cream as a base/primer, then Studio Fix Fluid and Studio Finish Concealer to recolor the skin, and then Studio Fix Powder to set and add tone, and lastly Mineralized Skinfinish Natural to help contour.
- Christopher recommended the following Face & Body Colors for your kit: c1, c3, c5, c7, n3, n5, n9
- He also recommended the following shades of Studio Finish Concealer: nc15, nw20, nc30, nw40, nw50
- Pinch O' Peach Blush was applied on the cheeks to give a soft, blushing bride look. It was also strategically placed in between contour and highlight.
- Christopher recommended the following blush colors for your kit: Prism, Pinch O Peach, Raisin, Pinch Me, Pink Swoon, and Blunt
LIPS
- The key is to overdraw the lips. Using the Pro Long Wear concealers are great because they last! Usually you'll do a contour with darker on the edges and lighter in the middle.
- The MAC artist went for an ultra fem look - plum liner, hot pink lipstick, and baby pink gloss right in the middle.
EYES
- The area near the brows now becomes the crease. Use an orangey/pink shade to help color correct this area. Colors like sushi flower/passionate/free to be work well.
- Don't be afraid to go for ultra browbone highlight - he used a shimmery shade phloof to further give the illusion of a lifted browbone
- Lashes are key - don't be afraid to stack lashes to make them more dramatic and go for the top and bottom lashes
- Go ahead and dramatically wing out that liner to give the illusion of a doe eyed, open shape. The MAC artist loves the Boot Black Liquid Liner because it gives a patent shine and easily glides over the lashband and shadow.
- Christopher recommended the following eyeshadow colors to fill a 15 pan palette for your kit: vanilla, orb, bamboo, soft brown, saddle, cork, folie, swiss chocolate, embark, vapour, stars and rockets, tilt, sketch, sushi flower/free to be/or passionate, carbon. He recommended the following colors for a 4 pan brow palette: omega, cork, coquette, embark

Check out my haul!
I picked up some disposable cheek applicators - they're pretty cool actually. The silicone pads are great for cream and even powder blushes and could come in handy with a large gig.

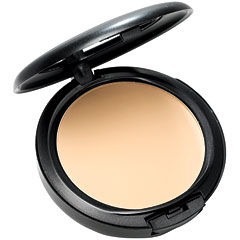
These are the new MAC Palettes - they have a clear cover. You can buy the 15 pan insert separately, but I prefer it without since you can fit more. In comparison with the Z-Palette it's a bit smaller.

I picked up these Pro Longwear Liners the MAC Artist recommend - one is a deep brown, similar to Chesnut and another is a Plummy Pink. They go on super smooth but don't budge! I'm thinking of picking up more of them.

Swatches - these are true to color

This lipstick wasn't one of the recommended items but I wanted this gorgeous reddy wine shade for the fall.

Super pretty! I paired it with Ben Nye Vino pencil and wore it in a recent video.

This is the shimmery browbone shade that the MAC artist recommended - apparently Dita Von Teese uses it a lot!

This is the brow brush he used - it has a combo of synthetic and natural fibers. I like it!

The MAC Artist used this prior to skincare. It has so many healing properties. I'm almost out of my current bottle so I picked up another. I even love it more than Fix Plus!

I have no idea what that strange brown dot is on the box, lol. Anywho, this serum is great. He really talked it up and I have to say, you see an instant difference after using it. I think this maybe my go-to serum.

This is a classic item - the Fast Response eye cream instantly diminishes puffiness and blurs out fine lines. I love the squeezy tube container - great for my kit. I picked up two! One for my studio and the other for my Zuca.

FTC Disclosure: All products purchased by me.
Atlanta Makeup Artist
Atlanta Photographer
Post a Comment
i use cork and lingering in my brows lol! fab tips ... thanks for sharing. the class in my area is full ..ahhhh romero jennings is teaching it =((
Nice products.
So jelly you had that class in ATL...they didn't offer it here in NYC =( Been looking to build a brow palette and get studio finish concealers. And you just gave the list in one post. Awesome sauce!!
Hi Sir, You really good writer.
Ok, so this is precisely what I want to do – freelance blogging. I’ve got two steady gigs now, but I’d like to add just a couple more. Your tips were terrific and I’m going to apply them. Thanks for the great post.What makes our anti aging skin care cream special? OurAnti aging skin care cream draws from nature and multi-ethnic wisdom. Experience our skin renewing cream today. This luxurious anti-aging wrinkle lotion is made with multi-ethnical wisdom to provide effective epidermis rejuvenation. This epidermis renewing lotion features a blend of botanicals, anti-oxidants, minerals, body fat, and aminoacids, which nourish the cells to promote natural production of collagen and elastin.
Oh Thank You Very Much For Write That Fantastic Article
Nice products
Cosmetic Surgery India
Post a Comment